
How to Get an Apostille in New York City in Three Easy Steps
***UPDATE*** Hey there! If you find my blog helpful, please consider leaving a $5 tip to keep this website up and running. Thanks for your generosity! - M.
What is an apostille?
If you are applying for dual citizenship, you’ve probably come across the word apostille.
An apostille is a type of authentication for a document. Apostilles are necessary when a document will be sent to another country. For example, applicants for dual citizenship submit vital records with apostilles guaranteeing the authenticity of those documents.
How do you pronounce apostille? Nobody agrees. The most popular pronunciations I’ve heard are “ah-puh-STEEL” and “uh-POSS-teel.” (Funny thing I noticed recently: the New York vital record offices tend to use the former, while the New Jersey offices use the latter.) All I know is that autocorrect always changes “apostille” to “apostle,” which has a completely different pronunciation and meaning. Thanks, technology!
Getting an apostille can be confusing. In New York City, you need to visit three offices to get an apostille for your document. Therefore, the easiest and fastest way to get an apostille in New York City is to visit in-person or hire someone to go on your behalf. If you live outside of the New York City area, you can complete the process from afar by mail. The mail-in process is less expensive, but may take weeks or months. Totally your call, depending on your needs and resources.
The first time I got an apostille, it was a mess. I wondered, “Why hasn’t somebody written out coherent directions for how to do this?” Afterwards, I decided to write this post in order to help others avoid the pain, annoyance, and lost time that I did.
Note: These steps only apply to vital events that occurred in New York City. If your ancestors’ vital events took place outside of New York City, the process will be different.
Step One: Get the document that needs an apostille
In my line of work, most documents that need apostilles are vital records submitted for dual citizenship. Vital records for ancestors who were born, married, or died in New York City will be at the New York City Department of Health (newer records) or the New York City Municipal Archives (older records).
If your vital record is at the Municipal Archives, here are a few helpful tips:
When you purchase your record copy, let the staff know that you are getting an apostille. Currently, records cost $11 each.
The staff will print out a letter for you. Currently, that costs $5.
The staff will also give you a handout with the locations for the New York County Clerk and New York State Department of State offices. Ignore this handout. Some of the information is outdated and incorrect.
Step Two: Visit the New York County CLerk’s Office
Once you have your ancestors’ vital record(s), you’ll need to have them authenticated by the New York County Clerk. The County Clerk’s office is a few blocks away from the Municipal Archives.
The County Clerk’s office is located inside of the New York County Supreme Court building at 60 Centre Street. It’s a big ol’ courthouse with columns. The entrance looks like this:
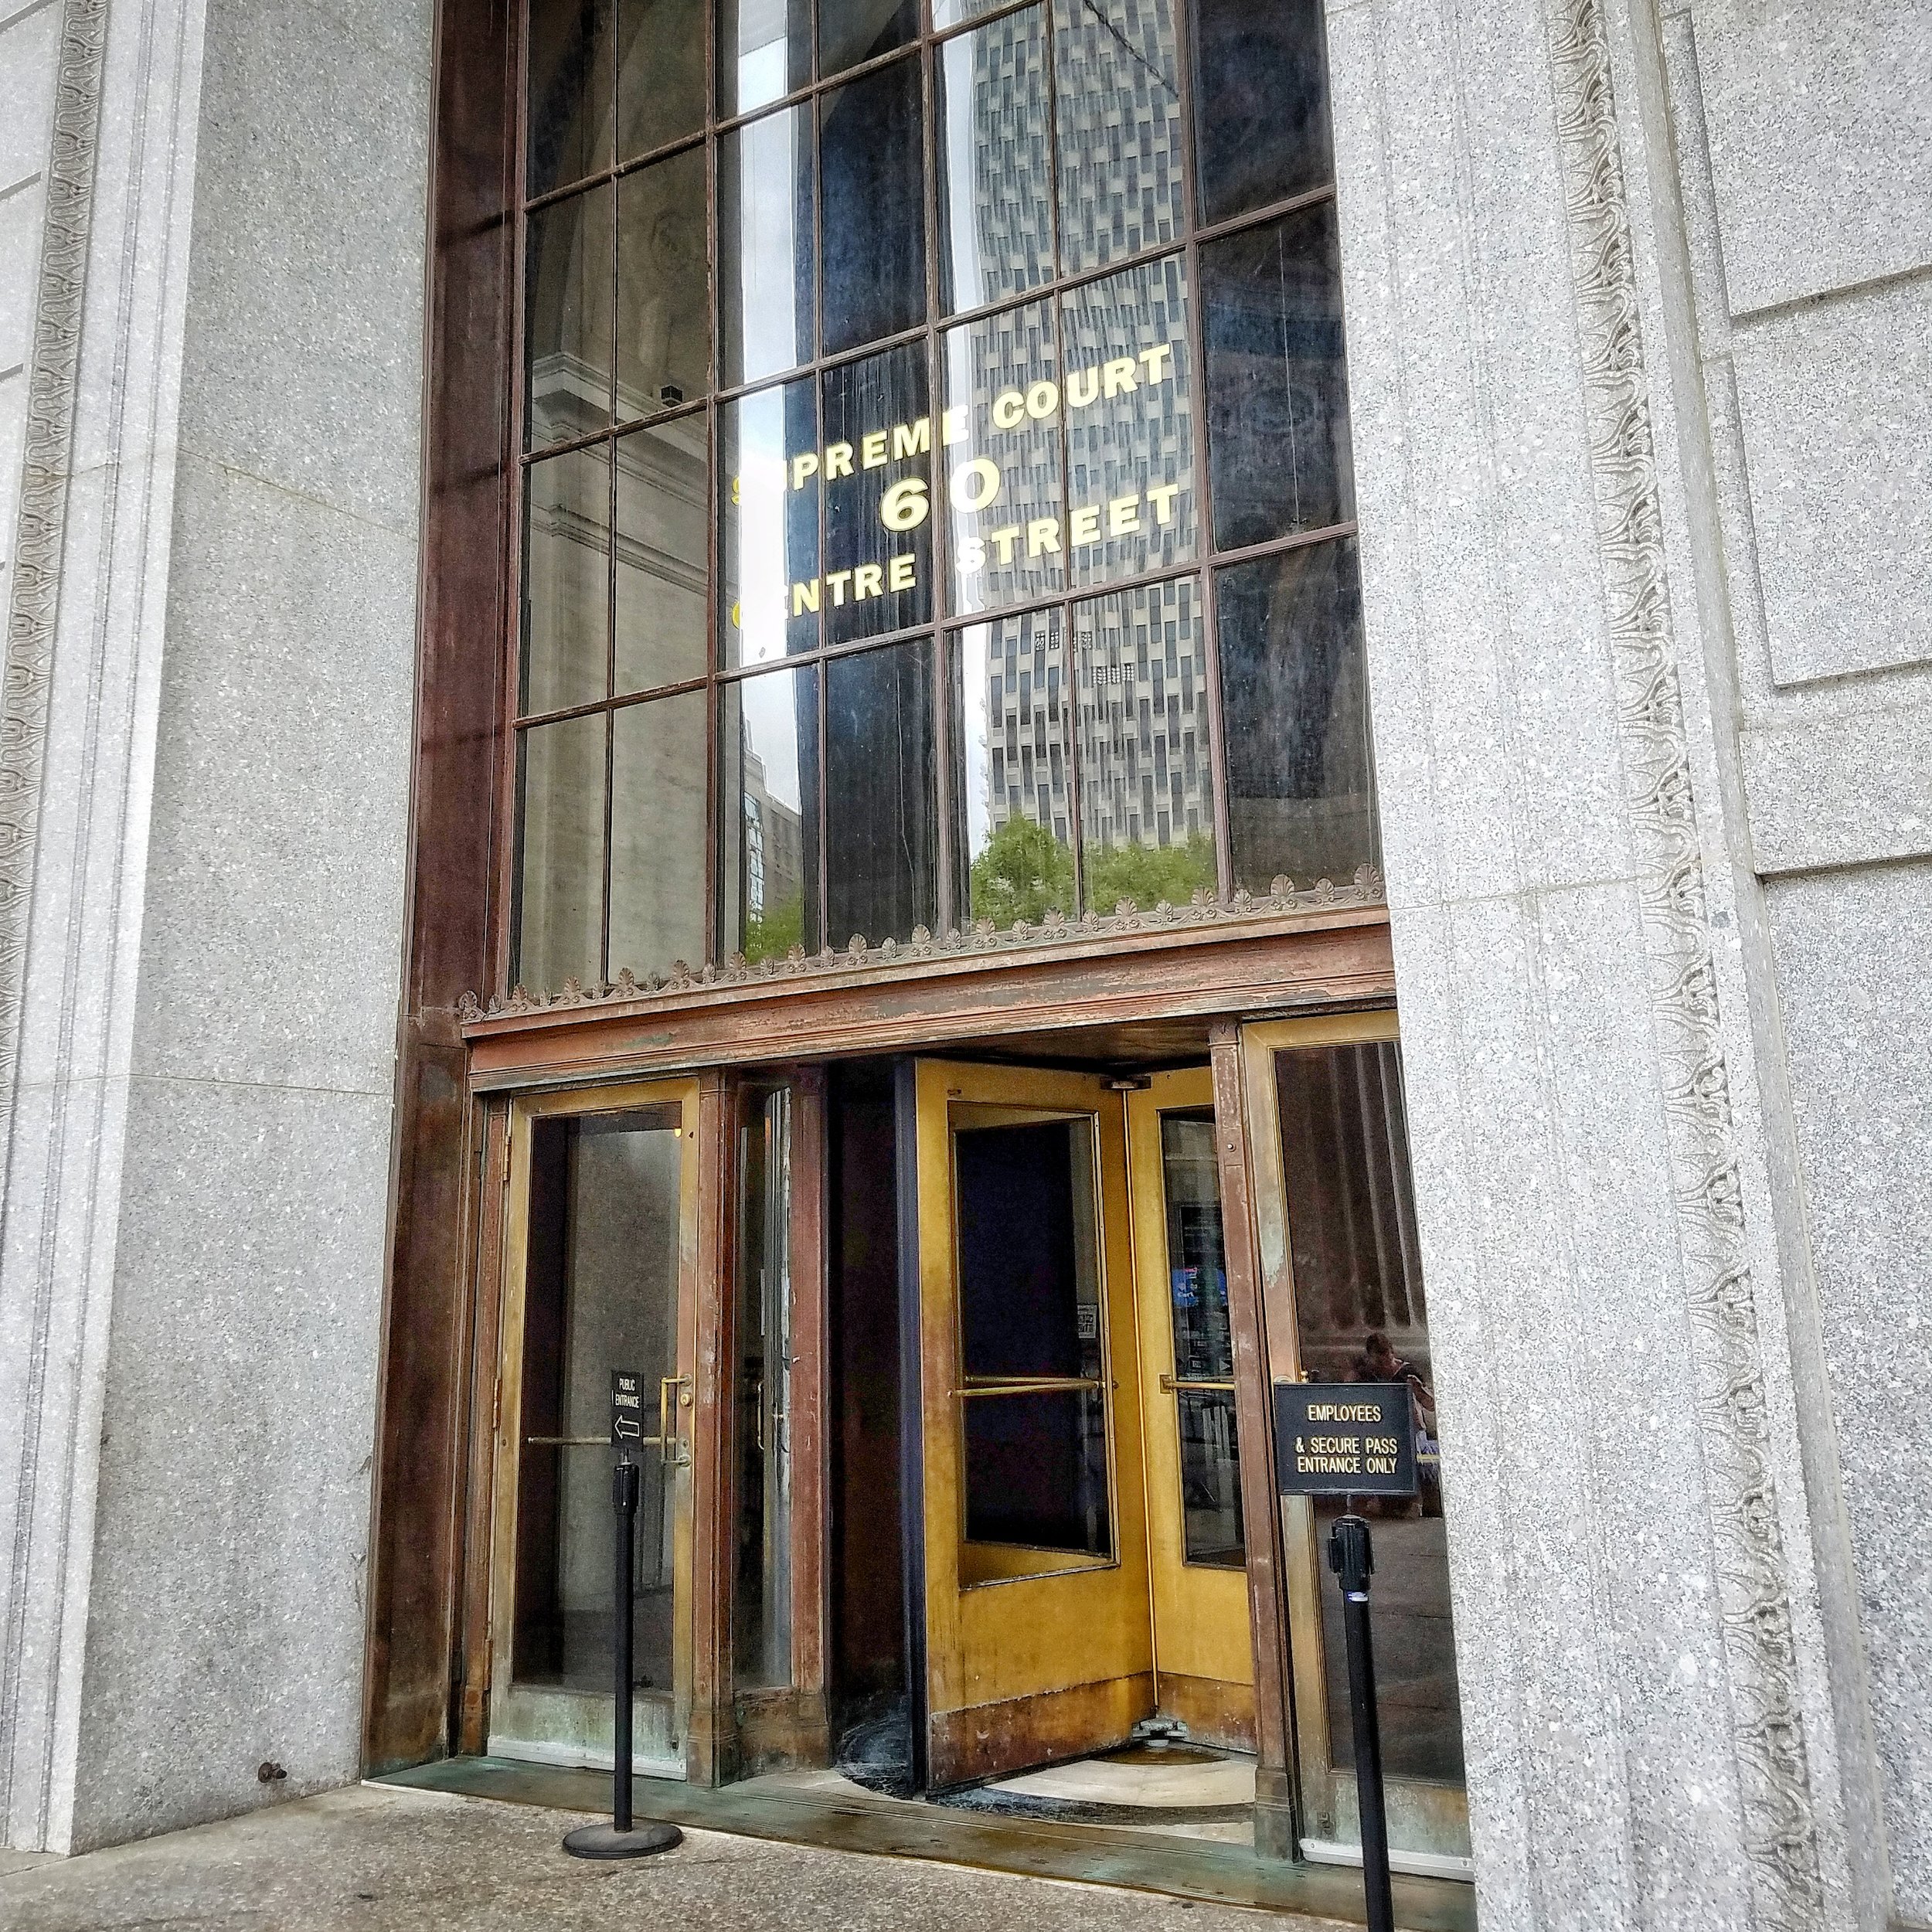
The entrance to 60 Centre shows the building’s address in the windows (“Supreme Court 60 Centre Street”). There is a wooden revolving door in the center and two regular doors on either side. The regular door on the right is reserved for employees.
Head through the revolving doors and veer left to enter the security line. It can get a little long, but it moves quickly.

Inside of the elevator at 60 Centre Street, showing the floor indicator lights from “B” (basement) through 5.
Once you are through security, turn right for the elevators and hit the down button for the Basement (B). When you exit the elevator, turn right and follow the arrows on the wall to Room 141B.
Once inside, there are three lines. Get in the line on the far left, which is for the notary. Don’t step up until you are called.
When called, let the clerk know that you are getting an apostille. Present the record(s) and letter from the Municipal Archives. They’ll ask you for your first name. Then, they’ll take everything and instruct you to get in the cashier line (middle line).
Once called, they’ll confirm your first name and give you your documents with the authorization from the New York County Clerk. The fee is $3.00 per document. Card payments are accepted, as well as cash (I think).
Step 2.5: Get a Money Order
“Wait, I thought there were only three steps!”
Yes, your final stop will be the New York State Department of State’s office to get your apostille. Before you can complete the process, you’ll need to get a money order for $10 per apostille, made out to “NYS DOS” (New York State Department of State). If you have two records, it’ll be $20. If you have three, it’ll be $30, and so on. (The DOS also accepts personal checks, but not all of us carry those around anymore. If you want to write a personal check instead, jump to Step 3.)
The New York State Department of State’s office is a 10-minute walk from 60 Centre Street. On your way, you can pick up a money order at Downtown Pharmacy, 165 William Street. Or, prepare better than I did and visit your bank or preferred vendor ahead of time.
Step 3: Get your Apostille at the New York State Department of State’s Office
Remember when I said to disregard the handout from the Municipal Archives? That’s because the handout says the DOS’s office is at 123 William Street, 19th floor. That is incorrect. The DOS hasn’t been on the 19th floor for years.
Instead, head to 123 William Street, but go into the entrance on the left with the DOS seal over the doorway. Head up the escalator to the 2nd floor.
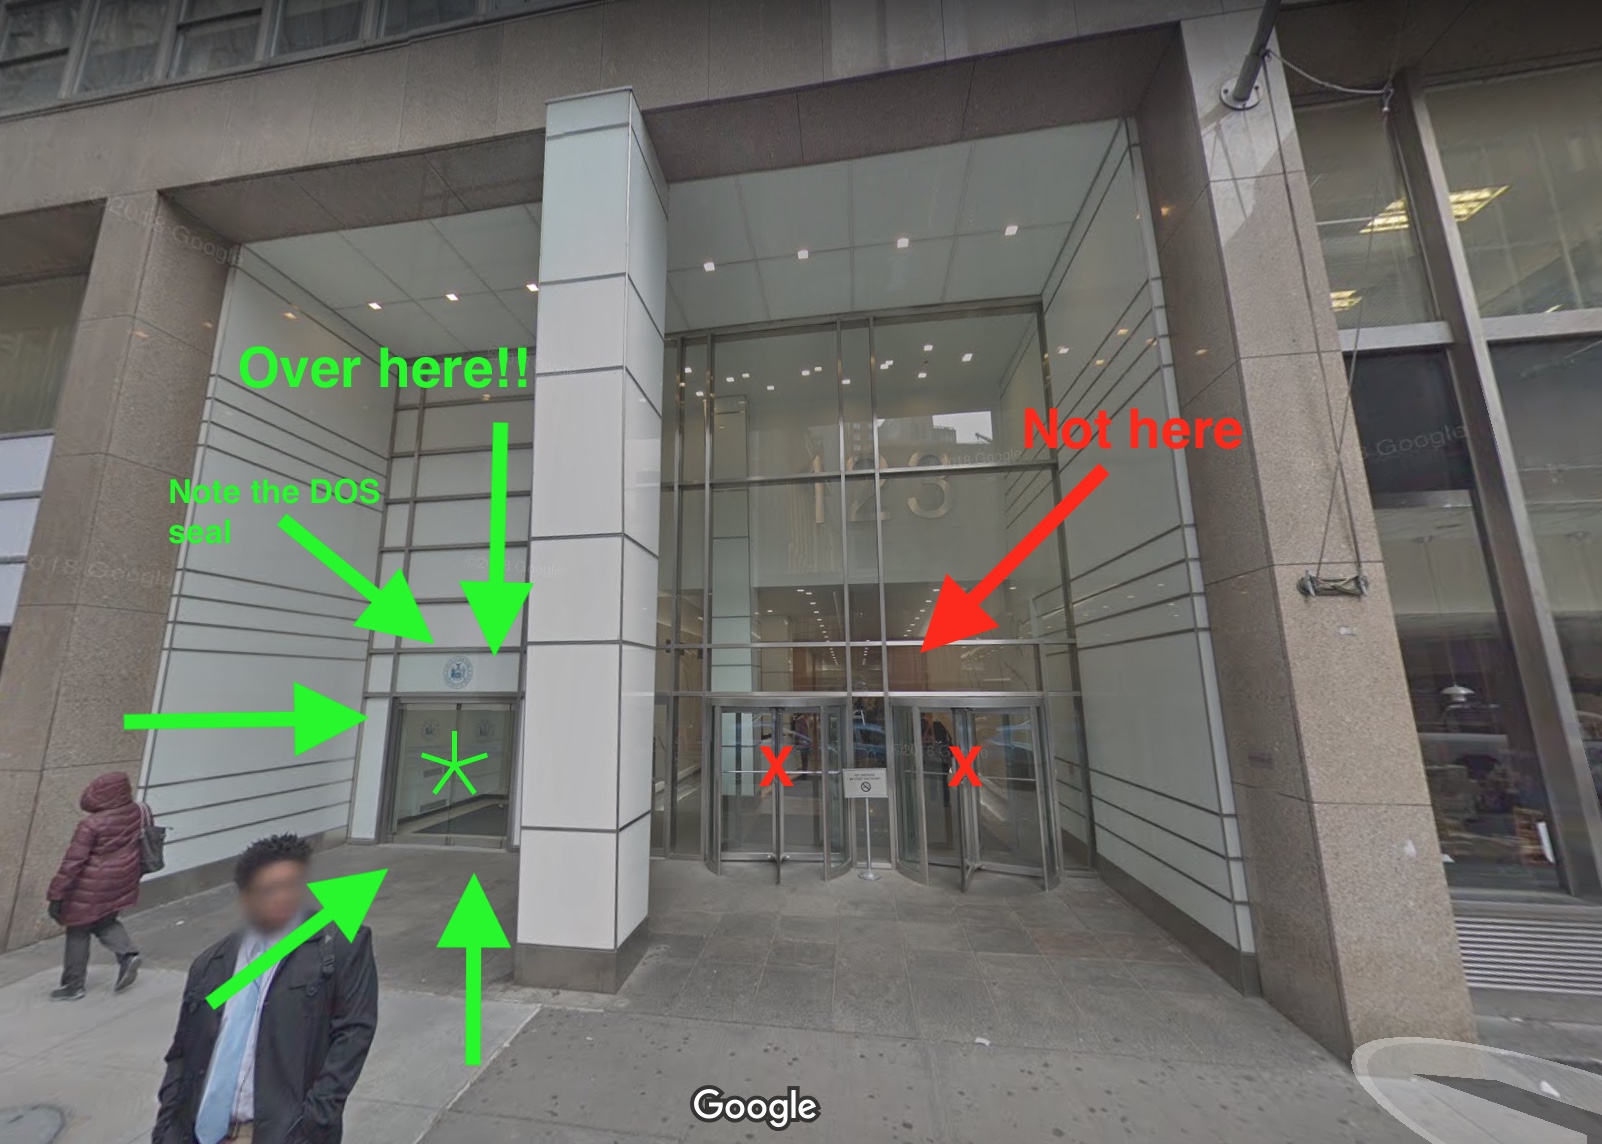
Google Street view image of the entrances to 123 William Street. Head to the entrance on the left with the tiny blue Department of State seal over the entrance.
When you reach the second floor, take a number from the dispenser on the right side of the main desk. Also, fill out a form (available at the table by the dispenser) with your information, how many documents need apostilles, what country you’re sending them to, and how much money you’ll be paying. Expect to wait at least 10 minutes for them to call your number.
When they call your number, head to one of the windows at the back of the room. They’ll take your documentation and payment and start processing your apostille. This process takes at least 15-30 minutes.
When they’re finished, someone at the main desk will call your name and you can collect your apostille!
It’s just that easy.
I hope this post has clarified the process for you. Due to the popularity of this post, I’m no longer able to respond to individual emails with apostille questions. If you’ve found this blog post helpful, please consider leaving a $5 tip to say thanks. Literally thousands of people per month just like you gain assistance from this blog series, which is both free and ad-free, so I would be truly grateful if you could chip in a few bucks to keep it running and to support future posts. Many thanks!